|
|
|
|
Mooring Options |
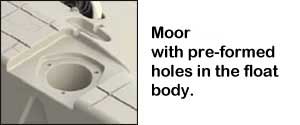
Installs easily through preformed
holes in the float body or chose
from three installation kits.
In water under 10’ moored
into the lake bottom with pier pipe.
Use almost anywhere. Position
jet ski float against a pier or
seawall and auger pipes into the
lake bottom. |
|
|
FREE Pier
Pipe Mooring Kit with the purchase
of a new float.
(a $203 value)
2-Pieces of 8', 10' or 12' long 2"
Pier Pipe
2-Plastic Augers (to hold in the
lake bottom)
1-Turn Bar (to twist the pipe into
the bottom)
1-Set of Raised Bushings (2 in a
kit) |
 |
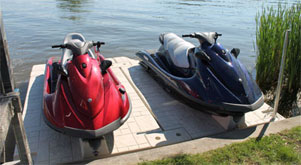 |

Position your float in the desired
location. Insert the pier pipe with
the auger bottom down through the hole
in the
float body and twist it into the
lake bottom. |
|
Dock or Sea Wall Mooring
Installation Options |
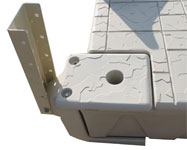
Knuckle
Kit ($249) IN LIEW OF OTHER FREE
MOORING KITS $75
 |
For more information on mooring kits
see options below. |
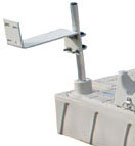
FREE Z
Bracket
Mounting Kit (a $159 value)
 |
|
What You Should Know About Jet Ski
Installation Kits |
|
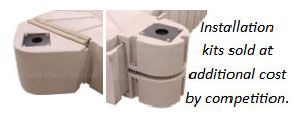
When shopping for jet ski floats,
you must pay attention to the
additional cost of installation
kits. Because our float body has
built in mooring holes you save on
optional “hole” kits. When you
purchase a new ski float from us, we
discount the price of the
installation kit. |
|
|
 |
 |
 |
|
NOT an add on for
us. |
NOT OURS |
NOT OURS |
|
|
|
|
Options and Accessories |
Please Note:
Most of these products are
discounted from MSRP as a courtesy
to people who purchase our floats.
We ship options and accessories
“free” with the order of a new
float.
To order individual parts and
accessories please check with the
vendor who sold you the float.
2”
diameter 1/8” Aluminum Pier Pipe 8’-$95, 10’-$110,
12’-$120
Sold as a pair of 2. Includes end
cap.
(8' pipe ships Fed Ex. Longer pipe
must go truck freight)
|
 |
|
|
High
Impact Plastic Auger $19.90
Sold as pair of 2
Use with our 2” pipe. Bolt
included. |
 |
2” Raised
Reducer Bushing $64 Sold
as a pair of 2
Fills the 6” hole in the float body
for less movement of the pier pipes.
There are various types of bushing
kits but the raised one works best.
Some customers don’t spend the
extra $64 for the reducer
bushings but it makes for a
better installation. |
 |
|
About Pipe Legnth |
For the best installation you’ll
want about 3’-4' of pier pipe
augured into the lake bottom. In
cases where the water depth
fluctuates you’ll want enough pipe
above the float to accommodate water
level changes. On inland lakes
without water fluctuation the
personal preference for shorter
pipes, out of the way, or longer
pipes, to grab onto, will dictate
pipe length.
Rough
Water Installation Kit. -
Use two sets of pier pipe, auger,
and raised bushing kits.
Most installations require just two
pier pipes, usually in the front, to
anchor your Float. However in some
rough water conditions an additional
set of pipes, in the back is
helpful. |
|
Snap-In
Caps $59 sold as a pair
of 2
Floats have four 6” mooring holes.
You’ll usually use two for mooring.
Snap-in caps fill the unused holes.
It’s an aesthetic touch but also
protects against stepping in the
hole. |
 |
|
Knuckle
Attaching Kit $249
Attach to
floating dock or seawall where the
attaching depth is less than 18".
|
 |
The kit attaches through the holes
in the float body, a knuckle between
the steel plate, and the Float flexes
to absorb energy from loading.
Cannot be mounted less than
19 3/4” below the dock. The
brackets are 19 3/4” deep. Most
docks are less than 18” off the
water.
For deeper applications use the
Z bracket kit. |
|
Z Bracket
Mounting Kit $159
2-Z Brackets with U bolts and hardware
Fasten to dock or Sea Wall.
Select pier pipe and raised bushing
kit. |
 |
|
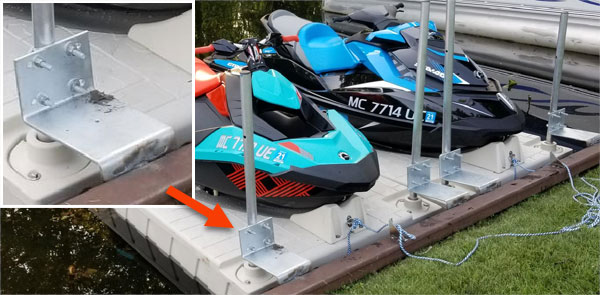
This is an installation on a
channel. This would normally be a
pier pipe into the lake bottom
installation. But the installers
couldn’t find a bottom to auger the
pier pipe into. Instead of pipe they
used the Z bracket kit against the
sea wall. We normally ask how deep
the water is to help you chose the
length of pier pipe but sometimes in
mucky or deep water, pier pipe won’t
work. |
  |
|
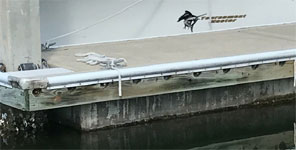
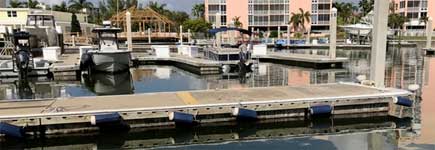
This is a common salt water dock in
Florida. It’s a floating drum style.
The top of the dock is about 18”-24”
off the water. The Z type mounting
kit works best on this type of dock
because the wood that you attach the
bracket to is high off the water.
|
|
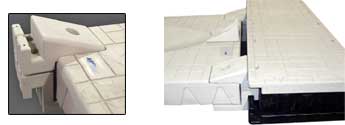
Water Craft Float to
Floating Dock $249
Mounts through preformed holes in
the watercraft float body. The unique
brackets slide into the H-Beam
Channel on the watercraft dock. Dock and
float rise and lower in unison. |
 |
|
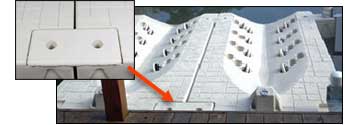
Port to
Port Attachment Kit $189
Attach two floats together. It’s
sometimes easier to position Floats
side by side rather than connected.
Connecting requires access to the
bottom. For winter storage it is
more difficult to remove 600 lbs. of
floats rather than two 300 lb.
floats. You usually only need one
mooring kit (on the left and right
float). |
 |
|
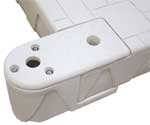
Stand
Alone Front Post Extension Kit $209
Extends the width of the port by
34”. For installations when pipe is
used in back. Extensions widen the
loading area. When the Float is used
for small boats you may need the kit
front and back. (2 per kit) |
 |
|
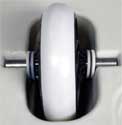
Friction
Discs NO Charge
One of our benefits is that our
wheels roll easily. Your PWC's
launch and retrieve effortlessly.
But there may be instances where
they roll
too easily. When this
happens the simple plastic disc adds
a bit of friction to retard the
roller. These are supplied free
to our customers who purchased a
float with us and request them. |
 |
|
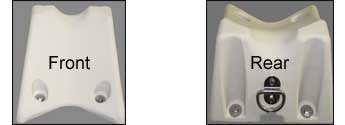
Bow Stop
STANDARD
The bow stop is included on our jet
ski float. The front is contoured to
fit the bow of most PWC's. It
prevents you from loading too far
forward, hitting the dock. A D-ring
is on the back for use in securing
your PWC in rough water (you supply
a rope or strap). XX” tall, XX” wide
firmly bolted to the float body. |
 |
|
|